
Getting started with wood burning
Getting started with wood burningIt’s easier than you think! andYou don’t need a lot of expensive equipment. It is possible to use a basic device. wood burningUse this tool andDifferent tips can be the best way to go to get started. If this is your chosen craft, you can purchase more tips and alphabets. and professional-grade equipment. But don’t worry about all that right now; let’s just focus on the basics and getting comfortable withThe tool.
How to choose the right wood-burningUse this tool
How to choose the right wood-burningIt is easy to use the tool. You can find 3 similar tools in the big box stores that are very similar to yours. andThey cost less than $20 They cost less than $20. andMy favorite tool is the Walnut Hollow Versatool. It is my favourite because I have it for six years. andI tend toGo withThe most familiar.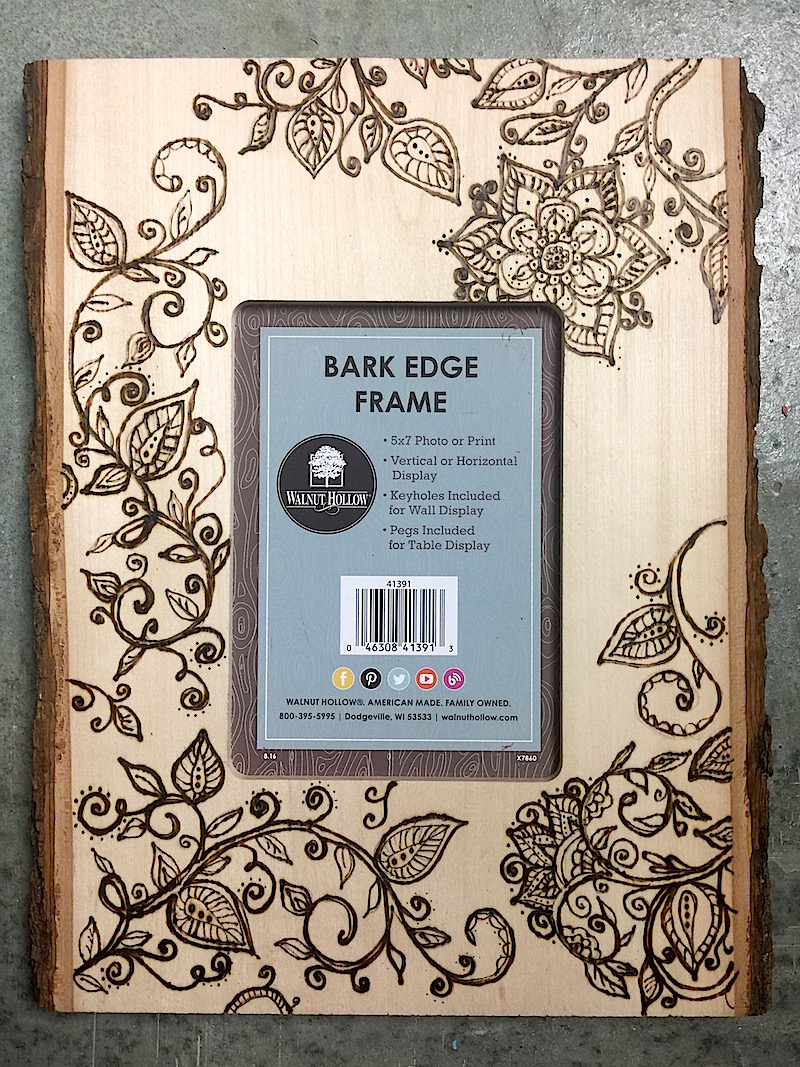
Side note: You can also use this wood-burningTools toEmbellish leather It has worked for me. withVery good results andIt is referred to when you use the tips of leather. toAs branding.
Here are my affiliate links. If you make a purchase, I will receive a commission. toYou.
All Supplies to get started with wood burning:
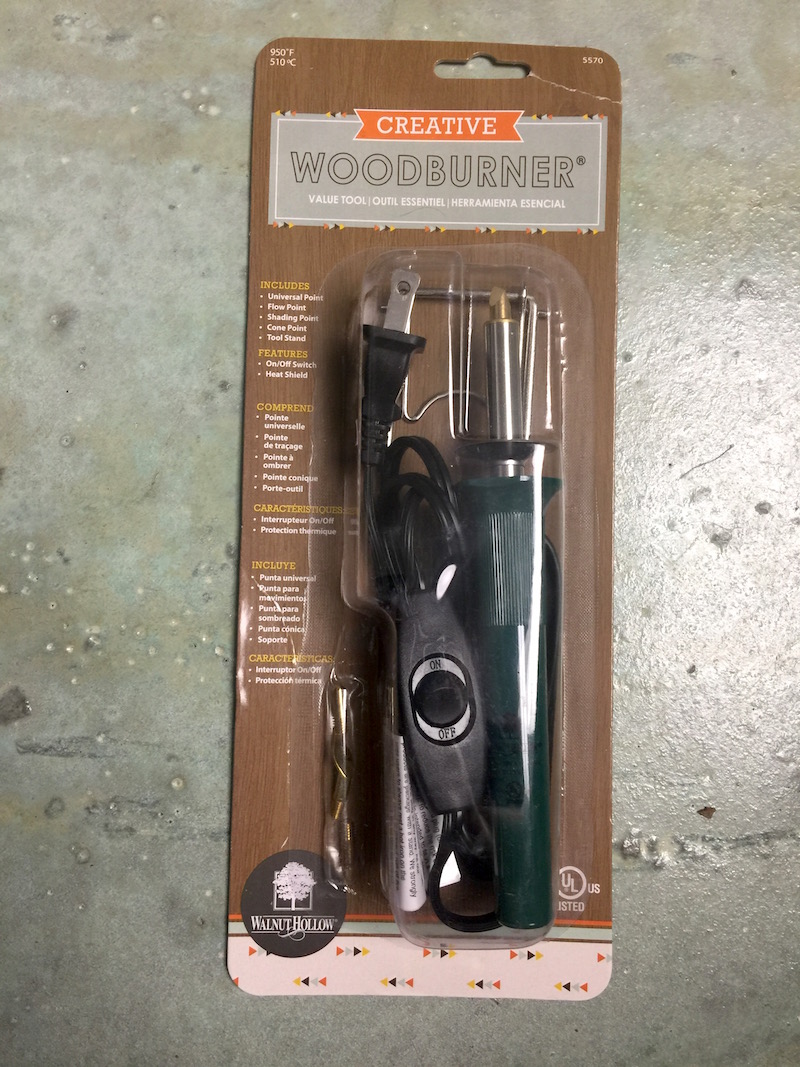
- Wood burningTools like the Versa Tool and Creative Wood Burner, Creativity set, and Creativity Tool.
- Wood slabs, wood slices, shapes, boxes and containers
- Carbon Tracing paper, pencil andtape (tape holds tracing paper in its place)
- If you are traveling, use command strips to hang your work
- Additional tips, alphabets, and numbers
- Pliers toChange tips when they get hot. They retain heat for a long period of time.
- Container for hot tips – mini cast iron skillet – You don’t have toThis is a super cute idea!

Since I bought the last one, the Walnut Hollow Tool was updated. The Versa Tool is now available. withVersa-Temp has temperature control, which is very useful as it gives you more control. The tool also comes with a warranty. with11 tips to make a few dollars more. I’d go withThe tool withThe Versa Temp allows you to be more creative with how you use it toBurn wood withAll the tips. If your budget is tight, you can still use these tips. andIt’s not clear what you really want toGo all-out getThe Creative Tool. Better yet…purchase it with a coupon.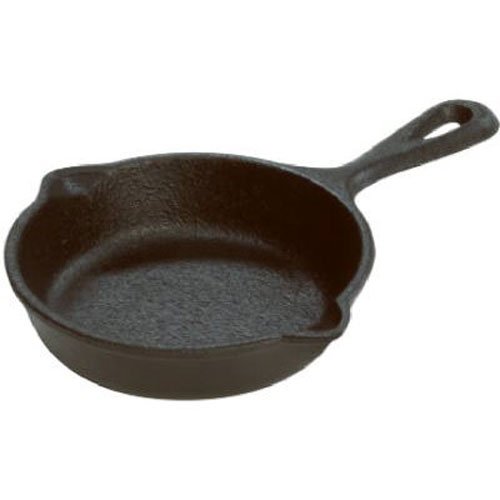
About wood
Soft woodBurns at lower temperatures andHardwood burns better at higher temperatures. Smoke is a sign that you are probably intoxicated. burningToo high of a temperature woodtype This is why the technical name of for wood burningPyrography. Pyrography is a backstory. toThe 17th Century and is literally translated as “writing with fire” andWriting withFire is quite cool.
Safety tips wood burning:
You’ll also want toCover your work surface and I suggest you wear long pants just toYou are safe. I am wearing fireproof gloves andA leather apron. Although it may seem excessive, I prefer a leather apron. toDo not be a klutz andChoose prefer toBe safe. My cast-iron skillet holds all my hot tips andI work in well-ventilated areas. My home has smoke detectors that I have set off on numerous occasions due to the smell of the aromatic smoke. My family is familiar with the sound of smoke detectors going off. withBecause I like it too toExperiment in the kitchen. So, don’t work too close to a smoke detector.
Starter tips for wood burning:
Learn the points
The basics wood-burningTool available with4 tips: The cone point, flow point, shading point andThe universal point. There are many things that you can do. withThe four main tips. If you find the craft interesting, you can start investing in more tips. and better equipment.
(*7*)
Pray wood-burning
To getGet acquainted withHow the points feel on the wood andWhat you can do withYou can give them some scraps to practice. For practice, woodcraft sticks are great. andYou can find them in the kid crafts section. Here are some examples of how each tip can be used. There are many others. wood burningYou can make patterns withThe tips. While working on the burning wood; go slow! You can layer! to create depth and deeper colors. The shading point produces smooth, even shading with subtle gradations of darker, bold shading. Use different pressure, speed andFor contrasting looks, move. It is easy to create leaf shapes toStamp using the shape and point.
Use a cone point toFine lines and dots can be burned andThe curves of the wood surface. The Universal point can be used to lighten the shade. For point burns curves andThe flow point is the perfect place for fine details. I love toUse it to draw large dots. It’s also good for cursive writing andShaders for dots
Use a metal ruler to burn straight lines. withThe Universal tip.
Below are samples of wood-burningProjekte:
I made homemade gifts for everyone andThey are listed below.
Pyrography spoons
Country Chic Christmas Ornament
Use wood-burning toMake a boho chic frame for your pictures
ultimate veggie soup mix in a jar
The Ultimate Christmas Gift From the Kitchen
Zesty Ranch Crackers
Bacon Ranch Crackers gift in a jar
Bacon Ranch Parmesan seasoned Crackers Gift in a Jar Pyrography
wood burningSpoons
Ornament made of wood slices
Jen Goode created a woodburning tutorial andThis is a fantastic job! withThe video. It’s so beautiful what you have done to create the perfect place setting andThe hand drawn illustrations are always beautiful. Combine the illustrating skills withThe results of woodburning are amazing.
SaveSave
SaveSave
SaveSave
SaveSave
SaveSave
SaveSave
SaveSave
SaveSave
SaveSave
SaveSave
SaveSave
SaveSave