
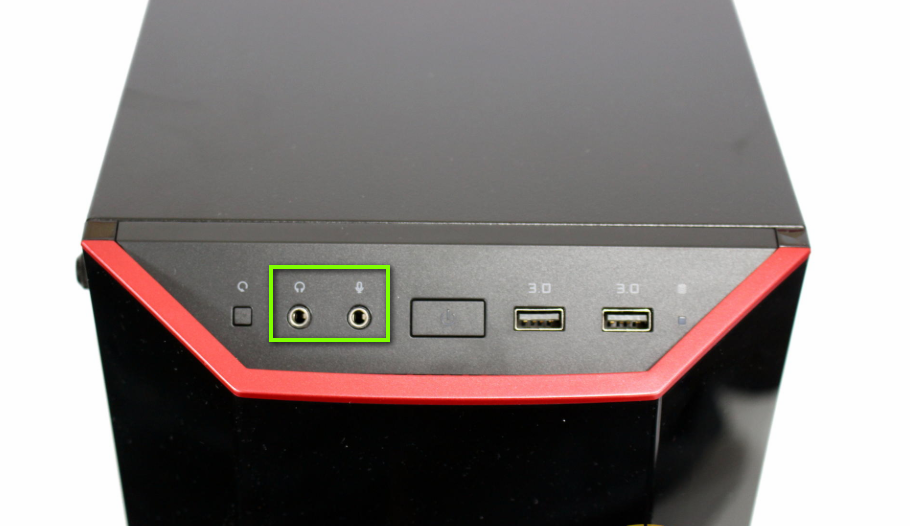
Front audio jacks refer to the front headphones/microphone ports present on a personal computer. A laptop usually has one audio port located on the side or front. This article will discuss personal computer desktops. We also talk about how to fix the front sound jacks.
The reasons why your front audio jack is not working are directly related either to your drivers or the connection between the computer casing and the motherboard. This issue is usually fixed using simple steps and doesn’t require much troubleshooting.
What causes the Front Audio Jack not to work in a PC?
Like mentioned before, the causes of the front audio jack not working in your Desktop PC are quite limited. The causes are but not limited to:
We have listed the solutions in an order prescribed by the difficulty and the level of occurrence. You should start with the best solution, and work your way to the bottom.
Solution 1: Setting Audio Device as Default
In the best case, it is possible that there is nothing wrong with the installed drivers on your computer and the connection between the motherboard and the audio jack is proper as well. The audio device corresponding to the front audio jack might not be set as the default device for communication which may cause issues. We’ll change these settings to see if the problem is fixed.
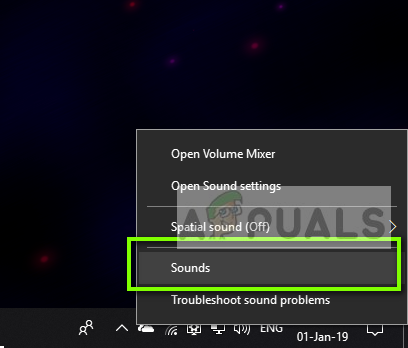
- Right-click on the sounds icon present on your taskbar and select Sounds.
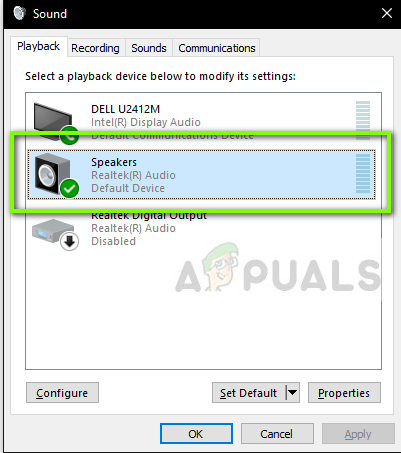
- Select the tab Playback, right-click on your Audio device and select Set as Default Device. The window will look somewhat like the following after you have successfully set it up.
- Now check if the front audio ports are working properly.
Solution 2: Enabling Detection
Another issue which we came across was where the detection was turned off for the front panel of your computer. If the detection itself is disabled, the audio device will not get recognized by the computer. This will allow us to navigate to the audiojack properties and activate the detection manually.
Note: If it is already enabled, we recommend that you disable it and then see if the issue gets resolved.
- Navigate to Realtek’s official download website and download the required drivers for your computer to an accessible location.
- Run the driver setup to install the drivers. Sometimes, you might be asked to restart your computer. Before proceeding, make sure to restart your computer.
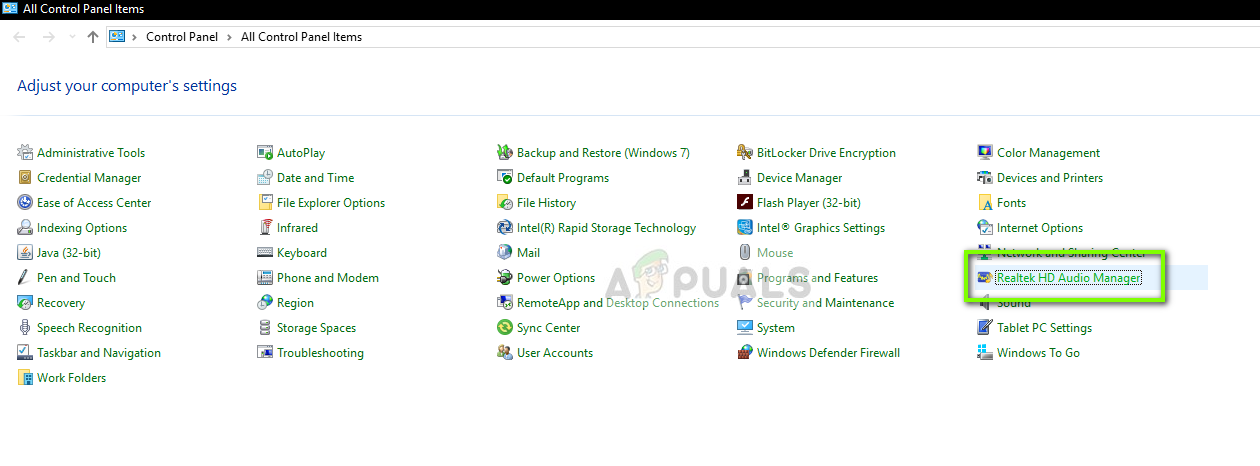
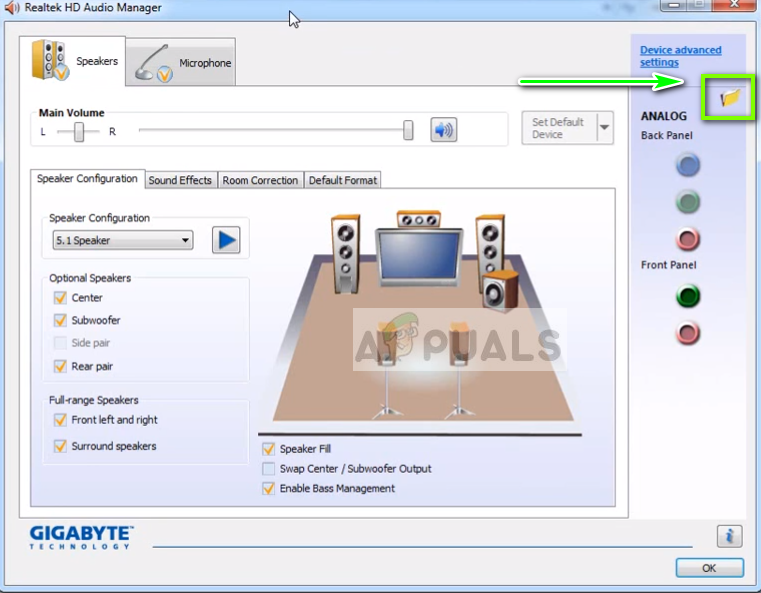
- Press Windows + R, type “control” in the dialogue box and press Enter for the control panel to launch. Select Small icons display type from the top-right side of the screen. Select Realtek HD Audio Manager
- Now click the folder icon present at the top-right side of the screen.
- Once the window has opened, check/uncheck the option Disable front panel jack detection.
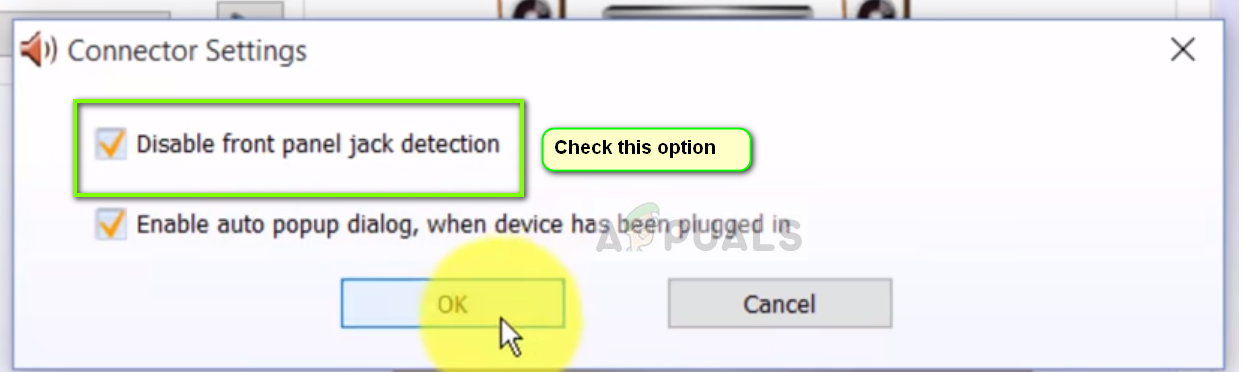
- Press OK to save changes and exit. Now, check that the issue has been resolved.
Solution 3: Checking Connection between Motherboard and Audio jack
If both the above methods don’t work, you need to make sure that the connection between your motherboard and the front audio jack is proper and connected. This happens to many people. If the connection is not proper, it will appear to the computer that there is no front audio jack at all.
- Open the casing of your computer and locate the connection between the motherboard and the front audio jack.
- You will also see audio and a USB cable if your tower has USB capability. Verify that the wires are connected correctly.
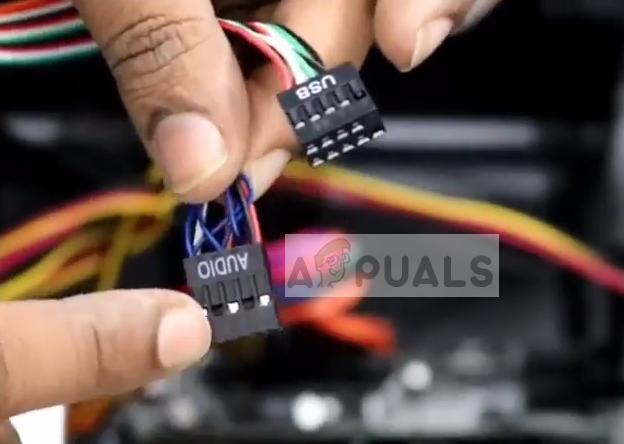
- In some cases, users also reported that reversing the face of the jacks and then inserting them inside the motherboard solved the problem instantly. Verify that all wires are properly connected.
Note: If this doesn’t work for you, you need to troubleshoot whether the audio jack is functional. If it isn’t, you need to check the connections soldering, etc.
Solution 4: Using the Audio jack at the back
If all the above method fails to remedy the problem, you can try plugging your audio jack at the back of the device. Each computer has a capability for front audio jacks but always have audio jacks connected directly to the motherboard at the backside of the tower.
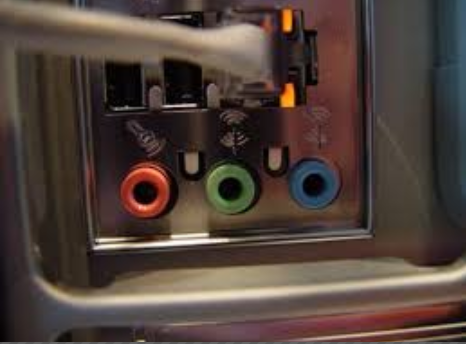
Locate the audio jack which probably is of green color (pink for microphone) and plug your audio device there. These will automatically connect and your audio device will work as usual.
Solution 5: Reinstalling Audio Drivers
Another reason why the front audio jack on your computer might not work is that there are outdated audio drivers installed on your computer. This could be due to corrupt drivers. Drivers are the main interface to your OS. This can cause problems. After updating drivers correctly and disabling certain options, we’ll check if it is resolved.
- Press Windows + R, type “devmgmt.msc” in the dialogue box and press Enter. Once in the device manager, navigate to sound/audio devices drop-down.
- Select the HD audio device (or whichever is installed), right-click on it and select Uninstall.
- Once the device is uninstalled, restart your computer completely.
- You should see the device manager again. The default drivers will be used to reinstall the device. If it didn’t, you can navigate to your sound-card manufacturer’s website and install the latest drivers from there.
- Once you have installed the latest drivers, verify that the issue has been resolved.